 |
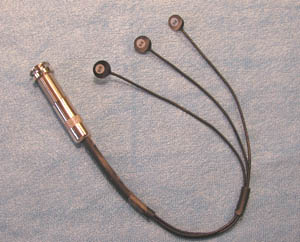
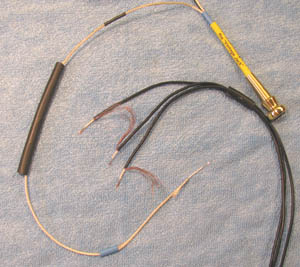
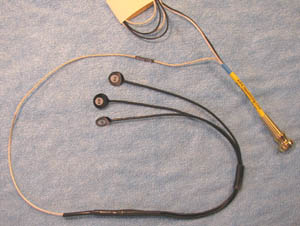
K&K Pure Western pickup system fresh from the box |
 |
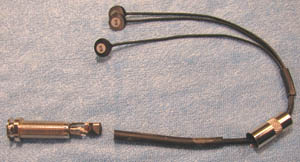
Unscrew the cover from the endpin jack and then.... |
 |
CUT! the wires near the strain relief clamp. This will give you
fresh wire to work with making your job easier. You can
unsolder the wire ends and salvage the endpin jack later. |
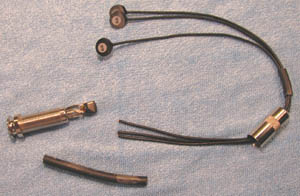 |
Remove the strain relief tube and the endpin jack cover* from
the pickup wires.
*not yet removed in photo. |
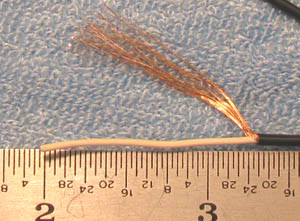 |
Strip the outer
jacket/insulation on one of the pickup element wires back about 1 1/4". Be careful not to damage the
shield wires. Then gather the shield wires to one side. |
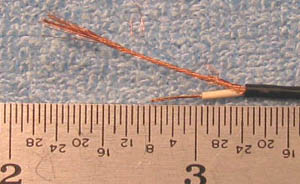 |
Cut the end of the inner wire leaving about 1/2" exposed
from the outer jacket/insulation. Strip about 1/4" of the
inner wire.
Repeat these steps for the wires for the other two pickup elements. |
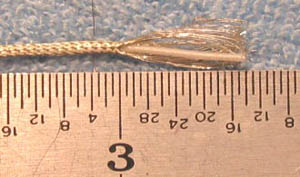 |
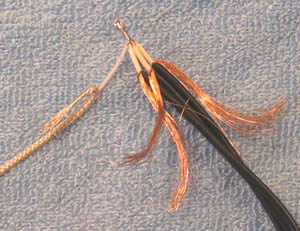
Prepare the mono/tip wire from Your Vintage Jack. Use a straight pin or similar tool to separate the shield wires for about
1/2".Be careful not to damage the
wires. |
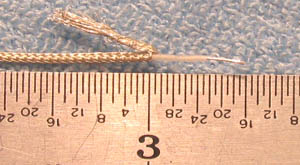 |
Gather the shield wires and fold them back along the Vintage
Jack mono/tip wire. Strip about 1/4" of the inner wire |
 |
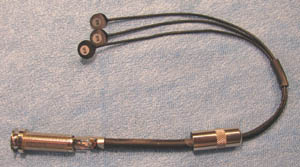
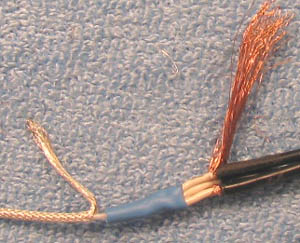
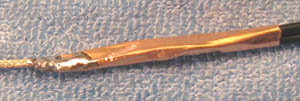
If you are going to use heat shrink tube to insulate your
connections, NOW is the time to slide it upon to the Vintage Jack
mono/tip wire. Here we are using a piece of 1/4" heat shrink
tube (black - about 2 1/2" long) and a piece of 1/8" heat shrink
tube (blue - about 5/8" long)
You should now have something like what is shown it the photo.
The color of the heat shrink tube does not matter this is what was
available when the photo was made. |
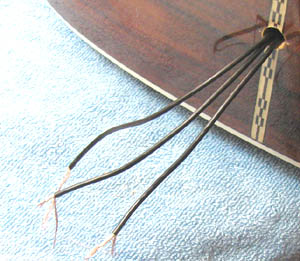 |
Thread the three wires from the pickup elements through the
endpin hole of your guitar from the inside. |
 |
Twist together and solder the ends of all four* inner wires.
*One from the Vintage Jack Mono/tip wire and one from each of the
three K&K pickup elements. |
 |
Fold the soldered connection back along the Vintage Jack
mono/tip wire. Trim the end of the soldered connection if
needed -- the inner core wires must NOT contact
the shield wires. |
 |
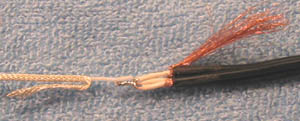
Slide the 1/8" heat shrink tube down from the Vintage Jack
mono/tip wire to cover and insulate the soldered connection. Heat
the heat shrink tube with your heat source (cigarette lighter) to
shrink it into place.
You could use electrical tape to insulate this connection instead of
the heat shrink tube. Electrical tape works well, but
the heat shrink tube is easier and makes for a better looking job. |
 |
Fold all of the shield wires down along the Vintage Jack
mono/tip wire and twist them together. |
 |
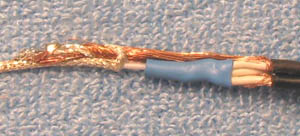
View of shield wire connection from the other side. |
 |
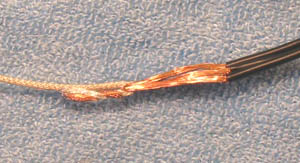
Wrap the connection with copper tape --
available in the stained glass department of many craft supply
stores. Here we used the tape lengthwise and covered the connection
leaving about 1/8" of the twisted shield wires exposed. (see left
side of the copper tape in the photo) The copper tape should
extend at least 1/4" onto the insulation of the pickup wires.
(see right side of copper tape in the photo)
Completely enclose the connection with the copper tape -- DO NOT
leave any gaps. This is important for proper shielding of the
connection. |
 |
Solder the exposed twisted end of the
shield wires to the copper tape and to the Vintage Jack mono/tip
braided shield. If you used more than one piece of copper tape, be
sure to solder each piece of copper tape to the next so that all are
electrically connected. |
 |
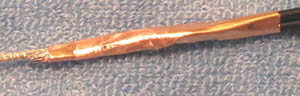
Slide the 1/4" heat shrink tube down from the Vintage Jack
mono/tip wire to cover and insulate the copper tape. Heat the
heat shrink tube with your heat source (cigarette lighter) to shrink
it into place.
This insulation is not absolutely essential, but it makes for a more
professional job. Electrical tape could also be used, but
again the heat shrink tube is easier and looks better. |
| |
Test
your connection and pickup signal.
Connect your pickup/Vintage Jack system to a guitar amplifier.
Turn the amplifier on with the volume set low (#3 or so).
Listen for any unusual hum or noise. GENTLY tap each of the
pickup elements to be make you have a signal from the pickup.
If all is well turn the amplifier off and disconnect from the amp
and continue with the installation.
Mount the pickup elements in your guitar according to the manufacturers
instructions.
Test the operation of the pickups before making
final installation of the Vintage Jack using powdered rosin.
With the Vintage Jack seated lightly in place
in the endpin hole of your guitar, connect your guitar to an
amplifier and play it some.
Sounds good doesn't it?
NOW you can make the final installation of the Vintage Jack -- Dust
a little powdered rosin on the tapered portion of the Vintage Jack
and insert it into the endpin hole in your guitar with a firm push
and a little twist.
The extra wires from the Vintage Jack should be coiled and secured
inside your guitar. They are not needed for this installation,
but you may want them some time in the future. |
 |
This is what your finished connection would look like if you had an
invisible guitar. |